Make the COR yourself

There are several ways to make the DUNI ball. Here we show an economical, fast and easy way to make a ball whose weight, to your liking, can range between 1.3 lbs and 2.6 lbs.

This COR will be constituted only by the external part. It will lack the internal part, but for training purposes, this ball is perfect. If possible, buy materials for at least three balls. This way you can vary the sizes and weights at will and save money.

MATERIALS

1) Three meters of hose for high pressure water of 10; 12.5 or 15 mm in diameter. Here in Argentina we have used the brand "SOLYON" type III colors: pink, green, transparent, etc.


2) 6 (six) rivets (snap) 3 (three) cm long each by 5 (five) mm wide, aluminum if possible.


3) 12 (twelve) flat washers (rivets) suitable for rivets, 5 (five) mm. The diameter of the washer should be about 18 (eighteen) mm by 1 (one) mm thick.


4) Plastic insulating tape for electrical conductors, PVC 19 (nineteen) mm by 20 (twenty) meters long, is quite suitable. We have used the TACSA professional tape No. 23 (twenty-three), red, green, blue, etc.


5) To give the COR the necessary weight, you can partially fill the hose with small pebbles, depending on the weight you want to give the ball. Other people have used chain links etc to fill the hoses.

TOOLS NEEDED

1) A punch to pierce the hose. If you don't have an awl you can use a nail or a drill with a bit.


2) A sharp (sharp) knife, with a point, to enlarge or round each of the holes made with the awl.


3) Two pliers to reduce the length of the rivets.


4) A small hammer to close the rivets once they have been cut, in order to prevent the washers from coming out.

PROCESS

step by step construction:

1) Cut the hoses into three equal pieces of about 90 (ninety) cm each.

2) At 2.5 (two point five) cm from each end of the hose, make a hole that crosses the hose from side to side. Next, bend the hose into a circle and place a single rivet through both ends.

3) This union is made with a rivet that will have a flat washer placed at both ends. Only then can the rivet be cut and closed.

4) Before closing each ring with the corresponding rivet, said ring must be filled with the filler material to be used.

5) The rest of the rings are made in the same way. However, care must be taken to interlock the first two rings with each other, before placing the rivets.

6) Once the first two rings have been joined together, we proceed to make all the remaining holes that the three rings have, approximately every 22 (twenty-two) cm, for a total length of 90 (ninety) cm.

7) The last ring to be placed, the third, must be intertwined with the other two, in such a way that between the three rings they form a perfect sphere.

8) Finally, in order to protect the hands of the players, the places where the rivets are located will be covered with the insulating tape, with several turns in the shape of a cross. Now the COR is ready to play.

MATERIALS:

TOOLS:

Assembly:

The hose roll (M1) as we have received it. In this case it is 10 meters.

With the cutter (H2) cut three pieces of the hose (M1) of 82 cm each.

Take each of the 3 pieces of hose (M1), and mark them with the pen (H4) every 20 cm, leaving 1 cm free at each end: a total of 5 marks

Carefully make 2 cuts on each mark as indicated in the drawing. Each cut 3 cm long.

At both ends of each hose (M1) make "V" cuts as indicated

With the scissors (H5) cut thin strips of Eva Foam (M3) 1/2 cm wide each by the length of each hose (M1).

Then, pass the wire (M4) inside each hose (M1) and hook a strip of Eva Rubber.

Pulling the other end of the wire (M4) slide the Eva Rubber strip until it crosses the entire hose (M1).

Now start the assembly of the COR, making a hose A (M1) cross inside the cut of the other hose B.

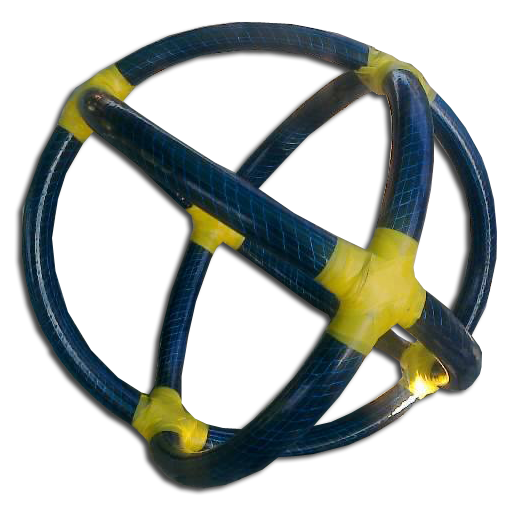
Here we already have the 3 hoses (M1) crossed forming the first triangle A-B-C

We then continue to cross the hoses (M1) through the remaining cuts.

CAUTION: it should always be avoided that 4 ends meet in a single crossing: they would be very difficult to fasten.

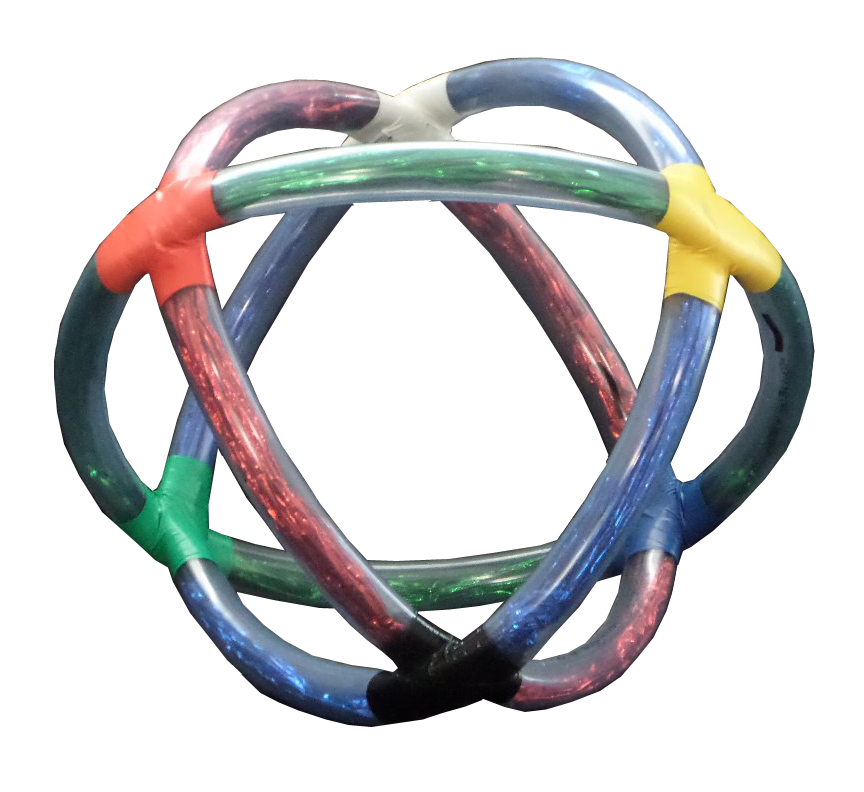
We begin to place the staples in each of the crosses, a single staple, always diagonally, from the inside out. To finish we cover each hose crossing with insulating tape, as seen in the image below.

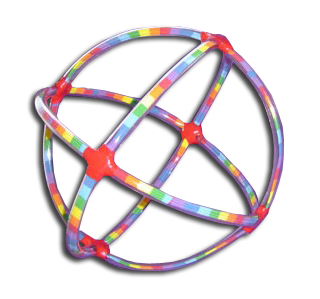
We already have the COR fully fastened, ideal for children's play.